Step 1: Prepare for Battle (a.k.a. Gather Your Tools)
First things first, you need to gather your weapons of choice. Here’s what you’ll need:
- A screwdriver (preferably electric unless you want a workout)
- A ladder (unless you’re a pro at hovering mid-air)
- Wire strippers (because wrestling with wires is fun)
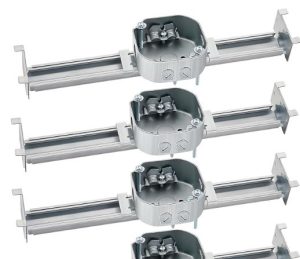
- A ceiling fan-rated junction box (because regular ones might betray you)
- A Harbor Breeze ceiling fan (obviously, or this guide is pointless)
Step 2: Turn Off the Power (Unless You Enjoy Electric Shocks)
Go to your breaker box and turn off the power to the room where you’ll be installing the Harbor Breeze fan. If you’re not sure which breaker controls the room, turn them all off. Your family might not appreciate it, but at least you won’t get electrocuted.
Step 3: Remove the Old Fixture (Say Goodbye to That Ugly Light)
Take down the old ceiling fixture. This usually involves unscrewing a few bolts, disconnecting some wires, and wondering why you ever thought this would be easy. If a shower of dust falls on your face, congratulations—you just found out when your ceiling was last cleaned.
Step 4: Install the Mounting Bracket (The Fan’s Support System)
Secure the ceiling fan mounting bracket to the junction box. If you skipped the part about using a fan-rated junction box, now’s the time to reconsider your life choices.
Step 5: Connect the Wires (Color Matching 101)
Now, connect the wires using these ultra-complicated rules:
- Black to black (hot wire)
- White to white (neutral wire)
- Green or bare wire to the ground screw (grounding is important—trust me)
If your wires aren’t color-coded, consult the manual. Or start questioning your decision to DIY this project.
Step 6: Attach the Fan Motor (You’re Almost There!)
Lift the fan motor and attach it to the mounting bracket. This is the part where you wish you had an extra set of arms. If your arms start to feel like jelly, take a break and rethink your gym routine.
Step 7: Install the Blades (Time to Look Fancy)
Attach the fan blades one by one. Make sure they’re balanced—unless you want your fan wobbling like it’s at a rock concert.
Step 8: Attach the Light Kit
If your Harbor Breeze fan has a light kit, install it now. This usually involves connecting a few more wires and securing the light fixture. Don’t forget to put in the light bulbs unless you enjoy explaining to guests why your fan has a non-functional decoration.
Step 9: Turn the Power Back On (Moment of Truth)
Head back to your breaker box and turn the power on. If you installed everything correctly, your fan should work beautifully. If it doesn’t turn on, you now have a modern art piece on your ceiling.
Step 10: Enjoy Your New Fan (Brag About Your DIY Skills)
Congrats! You installed a Harbor Breeze ceiling fan and lived to tell the tale. Now sit back, enjoy the cool breeze, and bask in the glory of your handiwork. Just don’t let anyone see the sweat stains from all that work.