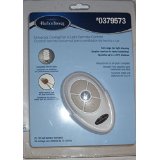
Choosing the Perfect Harbor Breeze Ceiling Fan Remote
Finding the right remote for your Harbor Breeze ceiling fan might seem daunting, but with a little guidance, it’s a straightforward process. The first step is to identify your fan’s model, typically located on a label on the fan’s motor housing or inside the canopy that attaches to the ceiling. This model number is crucial because Harbor Breeze offers a variety of fans, each with specific remote compatibility. If your fan came with a remote that needs replacing, matching the model number to an original replacement ensures seamless functionality. However, if you’re upgrading or adding a remote to a fan that didn’t initially include one, universal Harbor Breeze remotes are a flexible option that work with many models.
Understanding Compatibility for Maximum Efficiency
When shopping for a Harbor Breeze remote, ensure compatibility with your fan’s existing receiver. Most remotes are designed to work with specific receivers installed in the fan housing. If you’re unsure whether your fan has a compatible receiver, you may need to access the fan’s canopy to check. Newer models often include integrated receivers, but older fans might require an additional receiver kit. Always consult the product packaging or manual for compatibility details, as mismatched remotes and receivers can lead to frustrating setup issues. Choosing the correct remote saves time and guarantees smooth operation of your fan’s features, including speed settings and lighting controls.
Pairing the Remote: Syncing Made Simple
Once you’ve acquired the correct remote, pairing it with your Harbor Breeze ceiling fan is the next step. Start by turning off the power to the fan at the circuit breaker to ensure safety. Locate the dip switches inside the battery compartment of your remote. These switches must match the configuration of the dip switches on the receiver inside the fan. If the receiver’s dip switches are adjustable, you can customize a unique pairing code. Reinstall the battery, restore power to the fan, and test the remote. If the fan responds to commands, the pairing process is complete.
Programming Your Harbor Breeze Remote for Customization
Programming a Harbor Breeze remote allows you to personalize its functionality. Some remotes include features like timers or light dimmers that can be adjusted for convenience. For remotes with programmable timers, follow the instructions in the manual to set the desired operation intervals. For dimmable lighting, hold the light button on the remote until the brightness adjusts to your preference. Many Harbor Breeze fans also support multiple speeds, which can be cycled through using the speed control buttons. Once programmed, your remote becomes a powerful tool for creating the perfect atmosphere in your space.
Troubleshooting Pairing Issues
If your remote fails to pair with the fan, several factors might be at play. Double-check the dip switch settings on both the remote and the receiver to ensure they match. Confirm that the fan’s receiver is receiving power and that the remote’s batteries are fresh and properly installed. If issues persist, resetting the fan by turning the power off for a few minutes and then back on can often resolve connectivity problems. In some cases, replacing the receiver or remote might be necessary, especially if they’ve sustained damage or are outdated.
Universal Remotes: A Flexible Solution
Universal Harbor Breeze remotes are a great option if the original remote is unavailable. These remotes are designed to work with a wide range of Harbor Breeze fans and are particularly useful for older models with discontinued remotes. While universal remotes often don’t offer advanced features, they provide essential controls like speed adjustment and light toggling. Be sure to verify that your fan’s receiver is compatible with universal remotes before purchase. This ensures you don’t encounter functionality gaps or pairing difficulties.
Installing a New Receiver for Compatibility
If your Harbor Breeze fan lacks a receiver or the existing one is incompatible, installing a new receiver can bridge the gap. Receiver kits are readily available and typically include a compatible remote. Begin by turning off the power and removing the fan’s canopy to access the wiring. Follow the installation instructions to connect the receiver to the fan’s wiring, matching the colors as indicated. Secure the receiver within the canopy, restore power, and proceed to pair the new remote with the installed receiver. This upgrade modernizes older fans and enhances control options.
Maintaining Your Remote for Longevity
Proper maintenance of your Harbor Breeze remote ensures reliable performance over time. Keep the remote away from moisture and extreme temperatures, as these conditions can damage internal components. Replace batteries promptly when the remote’s signal weakens, and clean the remote’s exterior with a soft, dry cloth to prevent debris from interfering with buttons. Store the remote in a designated holder or safe location to prevent accidental drops or misplacement. Regular care extends the life of your remote and reduces the need for frequent replacements.
Exploring Advanced Features
Modern Harbor Breeze remotes often include advanced features such as reverse airflow control, which allows you to change the fan’s direction for optimal cooling or heating. This feature is particularly useful during seasonal transitions. Some remotes also integrate with smart home systems, enabling control through mobile apps or voice assistants. While these features add convenience, they may require additional setup steps, such as downloading an app or connecting to a home network. Advanced remotes provide a level of sophistication that enhances your fan’s usability and functionality.
Enhancing Comfort with the Right Remote
A Harbor Breeze ceiling fan remote isn’t just a convenience; it’s a tool for optimizing your fan’s performance. Whether you’re replacing a lost remote, upgrading to a universal option, or programming advanced features, understanding the process ensures a smooth experience. With the right remote in hand, you can control your fan’s speed, direction, and lighting with ease, creating the perfect environment for any occasion. By following the steps outlined here, you’ll enjoy hassle-free operation and enhanced comfort in your home.