Where can I find a Hunter Avia Ceiling Fan Remote?
Hunter Avia Ceiling Fan Remote Replacement Guide
Your remote control has disappeared into the void where all good remotes go to die – somewhere between the couch cushions and an alternate dimension. Or maybe it’s just stopped working after years of faithful service. Either way, you need a new one, and you want to know your options without spending a fortune.
Let’s explore the world of ceiling fan remote replacements and find the best solution for your situation and budget.
The Reality of Remote Shopping
Here’s what most people don’t realize: you’re not limited to finding the exact same remote that came with your fan. In many cases, a universal replacement might actually be a better choice than hunting down original equipment.
The ceiling fan industry uses standardized communication protocols, which means remotes from different manufacturers often work interchangeably. This opens up a world of options beyond what you might expect.
Your Replacement Options Explained
Option 1: Hunt for the Original
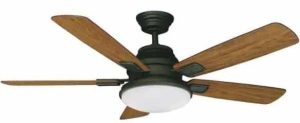
The Avia series uses specific remote models that offer complete integration with your fan’s features. If you want everything to work exactly as designed, this is your path.
Where to look:
- Manufacturer customer service (call with your model number)
- Authorized parts dealers
- eBay for discontinued models
- Ceiling fan repair shops
Pros: Perfect compatibility, all features work
Cons: Higher cost, limited availability, longer wait times
Option 2: Go Universal
Universal remotes are designed to work with multiple fan brands and models. They’re usually easier to find, less expensive, and often more reliable than originals.
Popular brands that work well:
- Hampton Breeze (widely compatible)
- Westinghouse (solid reliability)
- Casablanca (premium features)
- Generic RF controllers (budget option)
Pros: Lower cost, immediate availability, often better build quality
Cons: May not support every original feature
Option 3: Upgrade to Smart Control
Replace your traditional remote system with smart controls that offer app-based operation and home automation integration.
Smart options include:
- WiFi-enabled ceiling fan controllers
- Smart wall switches with app control
- Voice-activated smart home devices
- Retrofit smart receivers
Compatibility Deep Dive
Before you buy anything, understand how ceiling fan remotes actually work. Most use radio frequency (RF) signals at either 315MHz or 434MHz. Your new remote needs to match your fan’s receiver frequency.
What You Need to Match:
- Radio frequency: Check your old remote or fan documentation
- Speed settings: 3-speed, 4-speed, or variable speed
- Light controls: On/off only vs dimming capability
- Special features: Reverse, timer, or sleep functions
The Model Number Hunt
Finding your fan’s exact model number makes everything easier. Look for a sticker or metal plate on:
- The motor housing above the blades
- Inside the light kit housing
- On the original packaging or manual
- The fan’s mounting bracket
Real-World Shopping Strategy
Start Local, Think Global
Begin your search at nearby home improvement stores. They often stock universal remotes that work with popular fan models, and you can return them easily if they don’t work.
If local options don’t pan out, expand to online retailers with good return policies.
Budget Considerations
Set realistic expectations for replacement costs:
- Basic universal remotes: $20-35
- Original equipment: $40-90
- Smart controllers: $60-150
- Complete receiver/remote kits: $50-120
Read the Fine Print
When shopping online, pay attention to compatibility lists and customer reviews. Look specifically for mentions of your fan model or similar models from the same manufacturer.
Installation Reality Check
Most people can handle remote replacement, but there are some gotchas to know about.
Simple Replacement Scenario
If you’re replacing a similar remote, it’s usually just a matter of pairing the new remote with your existing receiver. This typically involves:
- Turning power off for 15 seconds
- Restoring power
- Pressing the sync button within 30 seconds
- Testing all functions
Complex Replacement Scenario
If your new remote isn’t compatible with your existing receiver, you’ll need to replace both components. This requires basic electrical work inside your fan’s housing.
Consider professional installation if:
- You’re not comfortable with electrical connections
- Your fan is hard to access
- Multiple attempts at pairing have failed
Money-Saving Alternatives
Wall Control Conversion
Instead of hunting for a handheld remote, consider installing a wall-mounted fan control. These replace your existing wall switch and offer speed and light control without the hassle of remote batteries and pairing.
Smartphone Apps
Some universal remote systems include smartphone apps that turn your phone into a ceiling fan remote. This eliminates the “lost remote” problem permanently.
Voice Control Integration
Smart home systems like Alexa or Google Home can control ceiling fans through compatible smart switches or receivers, giving you voice control without traditional remotes.
Common Pitfalls to Avoid
The “Looks Similar” Trap
Don’t assume that similar-looking remotes will work together. Internal electronics vary significantly even between models that appear identical.
The “Cheapest Option” Mistake
Ultra-cheap remotes often have poor build quality and limited compatibility. Spending a few extra dollars usually results in better reliability and features.
The “Perfect Match” Obsession
You don’t need to replicate every feature of your original remote. Focus on the functions you actually use regularly.
Testing Your New Remote
Once you’ve installed a replacement, test all functions systematically:
Basic Function Test
- Fan on/off
- All speed settings
- Light on/off
- Dimming (if applicable)
- Reverse function (if present)
Range and Reliability Test
- Test from different positions in the room
- Try operation from adjacent rooms
- Check for interference from other electronics
- Verify consistent response times
When Things Don’t Work
If your new remote doesn’t pair or work correctly, don’t panic. Try these troubleshooting steps:
Pairing Issues
- Verify fresh batteries in correct orientation
- Check that you’re following the exact pairing sequence
- Try pairing multiple times
- Ensure no metal objects block the signal path
Partial Function Issues
- Some features may not be compatible
- Check if pull chains override remote functions
- Verify wall switch positions
- Test with lights and fan separately
Future-Proofing Your Setup
Once you get your new remote working, consider these steps to avoid future problems:
Documentation
Keep records of your remote model, pairing instructions, and where you purchased it. Future you will thank present you for this preparation.
Backup Planning
If you find a remote that works well, consider buying a spare while it’s still available. Remote models get discontinued regularly.
Battery Management
Keep spare batteries on hand and replace them annually, even if the remote still works. Fresh batteries prevent pairing issues and extend remote life.
Replacing a ceiling fan remote doesn’t have to be complicated or expensive. Universal remotes solve most people’s needs at a fraction of the cost of original equipment, and modern options often include features that improve on the original design.
Start with your budget and required features, then work backward to find compatible options. Don’t get hung up on finding an exact match – focus on finding a reliable solution that meets your actual needs.
Remember that ceiling fan technology is fairly standardized, so you have more options than you might initially think. Take advantage of good return policies to test compatibility, and don’t be afraid to try a universal solution before hunting for expensive original equipment.