One of the most common repair issues with ceiling fans is replacing a broken pullchain. It is not inevitable that someone will pull too hard, someone will attempt to be tarzan, etc and the chain will pull out of it’s socket. In most cases the chain can not be reattached, however it is inexpensive and relatively simple to replace the socket and chain assembly.
1. Open the switch housing of the fan. This is usually achieved either by removing two screws on the bottom cap of the switch housing, or three screws on the side. Remove the pullchain assembly by unscrewing the brass finial on the outside of the switch housing.
2. Make careful note of which wires attach where to the pullchain. The chain itself will be marked L-1-2-3 or A-B-C-D or similar, the wires will customarily be of different colors, but if not, mark both the wires and pullchain if necessary. MAKE CAREFUL NOTE OF WHICH WIRES ATTACH WHERE. Every fan is different and if you do not make note there will likely be a complicated guessing game. I cannot stress this step enough. Make careful note of which wires attach where to the pullchain. For example:
Black – L, Grey – 1, Brown – 2, Purple – 3.
Some fans may use only two or three wires, some may have a pullchain with two layers and five or more wires. Regardless, make careful note of which wires attach where.
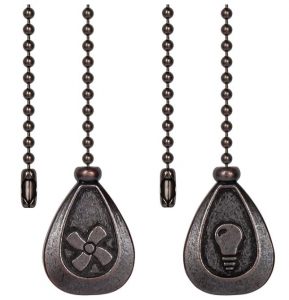
Decorative ceiling fan pullchains like this can be useful. Trying to figure out which pullchain is for the light and which one turns on the fan can be a pain – but if it’s indicated right on the pullchain, that works, right?
3. Remove the wires from the pullchain. In some cases they may be attached via wire nuts, in which case, remove the wire nuts. However in most fans the wires are inserted directly into the pullchain. Don’t make the mistake of cutting them, they can be removed completely by inserting a very small flathead screwdriver into the slot next to each wire. You will notice the ends of the wires are soldered, this is so they will attach to the pullchain.
How to Determine the correct Replacement Fan Pullchain
4. Determine the correct replacement pullchain. This is the tricky part. Many pullchains look alike but in fact switch differently. There are a few factors, first of all, how many speeds does the fan have as controlled by the pullchain? Second of all, how many wires are used to connect the pullchain? These will determine maybe 75% of replacement pullchains. Here are some examples:
- If the fan has three speeds and the pullchain has four wires, it is most commonly a L-1-2-3 pullchain. This is a single pole triple throw switch with an off position. It connects the power from L to 1, 2, or 3 respectively, one for each speed.
- If the fan has three speeds and the pullchain has three wires, it is an L-1-2-1+2 pullchain. This is a single pole double throw switch with an off position and a “both” position. That is to say, in connects power from L to 1 or 2 respectively, and on the third position connects to both. This is the same switch used in many lamps to switch on one bulb (or set of bulbs), the other, or both.
- If the fan has two speeds and the pullchain has three wires, it is most commonly a L-1-2 pullchain. This is a single pole double throw switch with an off position. It connects the power from L to 1 or 2 respectively.
- If the fan has three speeds and the pullchain has more than four wires, there are a handful of different pullchain possibilities however most hardware stores stock the most common replacement. This would customarily be a double pole switch with two layers of wires attaching.
The replacements mentioned above are the most common examples . . . but as I said, there are other switches that may appear identical (for example three speed fan, four wires, but it’s NOT the first switch I mentioned). In most cases I would first try the replacement mentioned above. These are the switches that your local hardware store should stock. If the fan does not work with the likely replacement, does not work on all speeds, spins too fast, too slow, etc . . . and you are sure you properly noted which wire connected where on the old pullchain and wired the replacement correctly . . . then it appears your fan is in the 25% that uses a non-standard switch. There are three ways to determine the correct replacement switch:
- Contact the manufacturer. If they are still in business they can theoretically send you the correct replacement switch. If they are no longer in business, contact someone on our forums or other ceiling fan experts, we/they may be aware of the correct replacement for your particular model
- If you can still switch speeds on the old pullchain, use an ohm-meter to check for continuity between the various wires on the various positions. In most cases the important relationships are between L and the various other positions, for example a three speed four wire switch might be L-1-2+3-3. This means in the first position L connects to 1, in the second position L to 2 and 3, in the third position L to 3, fourth position off.
- If you can not operate the switch, you can open up it’s plastic casing, either to operate the switch by hand, or to observe the metal bands inside. Some websites that sell replacement switches offer diagrams of the metal bands, by matching your switch up to the diagram you can determine the correct replacement.
5. Ok, you’ve determined and obtained the correct replacement switch. Seeing as you made careful note of which wires connect to where on the old switch, reconnect the wires in the same manner to the replacement switch. If your old switch did not require the tips of the wires be soldered you may need to do so in order to properly attach them to the pullchain.
6. Reattach the pullchain to the switch housing and replace the finial. Replace the switch housing cap with the two or three screws.
Additional Notes:
I. Fan lights where the pullchain is simply on/off use a two wire pullchain. This pullchain is a very standard on/off switch and it is simply connected to the two wires to which the old pullchain was connected. The wires can be reversed and it will still work. Lights where you can select one bulb, the other bulb, or both use the pullchain mentioned with that example above.
II. Some fans do not use the pullchain to control speeds, but instead have a dial or other control on the fan for speed selection. The pullchain is used to turn the fan off and on, and in some cases also to reverse the fan, select between the high speed and the various low speeds derived from the speed control, or also control the light. In these various examples:
- When the pullchain only switches the fan on and off, it most likely has only two wires and is equivalent to the light kit pullchain mentioned above. It is a basic on/off switch
- When the pullchain reverses the fan or switches the speed control in and out of the circuit, it is most likely the three wire two speed pullchain mentioned above. It is a L-1-2 switch. There are some exceptions such as certain model Fasco fans.
- When the pullchain controls both the fan and light, it is the three wire three speed pullchain mentioned above. It is a L-1-2-1+2 switch.
III. If for whatever reason you do not know which wires connect to which locations on the pullchain, you may yet have some options. For starters, black is almost always L. Some other common color combinations:
Here is the wiring colors for many four wire pullchains
L – Black, 1 – Grey, 2 – Brown, 3 – Purple
L – Orange, 1 – Black, 2 – Yellow, 3 – Purple
L – Black, 1 – Grey, 2 – Brown, 3 – Green
L – Grey, 1 – Yellow, 2 – Purple, 3 – Black
L – White, 1- Black, 2 – Blue, 3 – Yellow
For many three wire pullchains:
L – Black, 1 – Blue, 2 – Red
I will post more examples.