How to install a Hampton Bay ceiling fan
Installing a Hampton Bay ceiling fan requires careful attention to detail and adherence to safety guidelines. Before you begin, ensure that the power to the existing fixture is turned off at the circuit breaker to prevent any electrical accidents. Use a voltage tester to confirm that the power is off before proceeding with the installation.
Start by removing the existing fixture, including the light kit or fan blades. Take care to keep track of all screws and components for reassembly later. Once the old fixture is removed, you will need to install the new mounting bracket provided with your Hampton Bay ceiling fan. The bracket should be secured to the ceiling outlet box using the screws provided.
Next, assemble the fan according to the manufacturer’s instructions. This typically involves attaching the fan blades to the motor housing and securing them with the included screws. Make sure the blades are properly aligned and balanced to avoid wobbling when the fan is in operation.
After assembling the fan, you will need to install the fan canopy and ceiling plate. The canopy covers the wiring and helps secure the fan to the ceiling, while the ceiling plate covers the mounting bracket and provides a finished look. Use the screws provided to attach these components securely.
Once the canopy and ceiling plate are installed, you can proceed to connect the wiring. Most Hampton Bay ceiling fans have color-coded wires (black, white, and green) that should be matched with the corresponding wires in your ceiling outlet box. Use wire nuts to secure the connections and ensure they are tight.
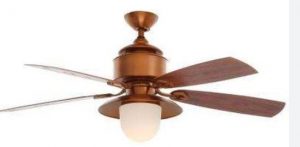
Hampton Bay Copperhead Ceiling Fan
Before installing the fan blades, double-check all connections and make sure the wires are tucked neatly into the outlet box. Once everything is in place, carefully lift the fan motor assembly and align it with the mounting bracket. Secure the fan to the bracket using the screws provided.
After the fan is securely mounted, attach the fan blades according to the manufacturer’s instructions. Use the blade screws provided and make sure each blade is tightened securely. Finally, install the light kit if your fan includes one, following the manufacturer’s instructions for wiring and assembly.
Once the fan is fully assembled and installed, turn the power back on at the circuit breaker and test the fan to ensure it is working properly. Adjust the fan speed and direction as needed using the included remote control or wall switch. Enjoy the comfort and style of your new Hampton Bay ceiling fan!